Showing posts with label Others. Show all posts

Thursday, February 20, 2014

Firefox Browser Will Now Display Ads To Boost Revenues


Shrinking revenues and sliding market share has forced Mozilla to include display advertisements in its popular web browser Firefox. Darren Herman, Vice President of Content Services at Mozilla announced via a blog post few days back that they are considering placing advertisements within their browser to boost revenues.

How Will It Work?

When you open a new tab in Firefox, you are shown 9 boxes, which are called Tiles. These tiles display the screenshot of the frequently visited websites, with a link to them. Internally, Firefox runs a ‘frequency algorithm’ which analyzes that user’s browsing history and accordingly displays the recommended websites in these tiles.
These tiles will display sponsored websites as well, which would be clearly marked as “Sponsored” just like Google advertisements.
Firefox Ads | Firefox Browser Will Now Display Ads To Boost Revenues

Directory Tiles

If the user is new, and has no previous browsing history, then Firefox will pre-populate these tiles with the most relevant website link it considers best for the user, based on a propitiatory algorithm. This new arrangement has been called as Directory Tiles, and the sponsored stories would be included in these recommendations. Mozilla has clarified that the sponsored tiles would be clearly mentioned and marked to remove any doubts.
The placements within this new Directory Tiles (which would also be sponsored) would be based on the present geographical location of the user, the most popular content within the Mozilla ecosystem and other factors.
This might be a first try for monetization as until now, Mozilla has refused any offer of advertisements on their browser, and this new decision may start a new trend in in-house advertisements for web browsers.

Revenue Model of Firefox Mozilla

Firefox has around 450 million users all over the world, commanding 18-23% of the market share, making them the third biggest web browser in the world after Chrome and Internet Explorer. In the last few years, Chrome has gained considerable amount of market share from Mozilla, which has resulted in lesser revenues.
The primary source of monetization of Firefox as of now, is Google ads. 90% of revenues generated by Mozilla comes from Google as they have signed an agreement making Google their default search engine. They have partnerships for displaying Google advertisements on the browser.
This new revenue model of displaying sponsored websites on it’s new tab window will surely attract criticism from the lovers of ad-free web, and from those who have already opted for “Do not track” feature.
Talks are still on with some of the biggest advertisers, to clearly chalk out a feasible plan of showing advertisements.
Will it negatively impact their positioning? Or users would be ok with it? Do share your views regarding this decision by Mozilla to show advertisements on their browser.

Tuesday, January 14, 2014

How to Download Torrents via IDM


With the help of new Cloud sharing websites, Downloading Torrents directly is much easier now. There are numerous of Paid and free torrent leeching websites which allow you to download any torrents direly via your browser. Here we have reviewed the Latest Websites to Download Torrents via IDM easily. this is the updated list for January 2014 and beyond.

Websites to Download torrents directly

Download Torrent via IDM

Many of your favorite content like Games, Movies or any applications are only available in torrents but Downloading torrents via Utorrent takes a lot of times also the speed will be depended on the torrent health, but here the torrent caching websites downloads the complete torrent file on their Server and will give you option to Download it via IDM or sdave in your Dropbox, google Drive, etc. Also the speed for downloading torrents directly is 10 times fatter as  what you get on Uttorrent. So leave the traditional method and check out these exclusive websites for your torrent downloading needs.

Tuesday, January 7, 2014

Balance Transfer trick For all Indian Mobile Operator(100% Working UPDATED - 2014)


Mobile Balance Transfer is one of the very unique service provided by mobile operators. Using this method your friend or you can transfer mobile balance to other mobile within few seconds.
mobile-balance-transfer
In today’s post I will share a awesome trick which will help you transfer balance from one mobile to other.
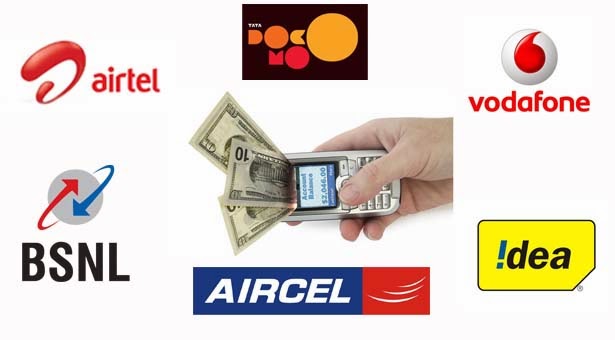
But before every thing , this service is not available for all mobile operators. Some operators which provide this service are – BSNL, Airtel, Idea, Tata Docomo, Vodafone, Aircel, Reliance, Uninor. If you are already using this service provider well and good, if not, to enjoy this you may have to port to these networks.

 Transfer balance from one mob. to another :

We will see the steps one by one for every operator .

Balance Transfer trick For BSNL:

If you are using BSNL , then balance transfer is most simple for you .All you have to need is send a message. Follow these following steps –
BSNL also utilises SMS to provide balance transfer service. To use this service, you need to type SMS in this format: Gift < Amount > and send it to either 53733 or 53738.
  • Limitations -You can transfer amount from Rs.5 to Rs.50 only. The receiver should be active from atleast for 30 days and sender should be active for atleast 3 months 
2. Balance transfer for Airtel :-

To transfer balance for your Airtel operator, follow the steps –
Just Dial USSD code *141#
A window will appear where you can see many option.
Select first option i.e Share Talk Time .
Just type mobile number ( receiver’s no ). For Example: Type Mobile number as 9794885066 then select the amount Rs. 20. Now Rs. 20 will be transferred to 9794885066.
  • Limitations - You can transfer Rs. 5 to Rs. 30  only. And after you have done with the transfer , you should have at least Rs. 10 balance . You can do this 5 times a day. 
3. Balance transfer for IDEA :-

Idea also provide this service in very simple steps –
Type - *567*< Receiver’s Mobile Number >*< Amount>#.
  • Limitations – You can transfer Rs.5 to Rs.100 only. You will be charge Rs.2 per transaction. Adding to this you can send balance only once in a day to a particular number.
4. Balance transfer for TATA Docomo :-

Tata Docomo has the simplest way to do this type of mobile balance transfer . You have to just send a simple message for doing this.
The format for message is -  BT Mobile Number Amount 
and send it to 54321 .Example – BT 9044799733 50. Here, Rs. 50 balance will be transferred to mobile number 9044799733.
  • Limitations – You will be charged Rs.2 for every balance transfer. The sender should be customer of Tata Docomo from atleast 90 days and receiver from 30 days.
5. Balance transfer for Vodafone :-

Simplicity is always been the strength of Vodafone. Also transferring the balance is very simple . Follow the steps given below –
Dial  *131*< Amount>*< Receiver’s Mobile Number>#  ,here the amount is the balance or money to be transferred to the receiver .You don’t need to give space in between. Example – Dial *131*20*9161938364# , Rs. 20 will be transferred to 9161938364
  • Limitations –You can transfer Rs. 3 to Rs.30 only . Balance can be transfer only once in a day to the same number. Processing fee may differ according to the amount you are transferring. It cost Re.1 for transferring Rs.5 .
6. Balance Transfer for Aircel :-

Transferring balance for Aircel mobile users is quite similar to Airtel. Following is the process;
Type *122*666# and call .Soon a window will appear , this will show various amounts to be transferred. Amount may range for Rs.5 to Rs.100 .Then Select the amount and then enter the receiver’s  number , press OK.
  • Limitations - You can transfer amount to a single number once a day. Rs .2 will be charged for every transfer . Funny thing is , Aircel does not guarantee for transfer and not responsible for money loss .
7. Balance Transfer for Reliance :-

 The tag line of Reliance “ Karlo Duniya Mutthi ” Mai is best suited here as you can really do every transaction for absolutely free and without any mentioned conditions .
The process is also very simple –
Dial *367*3#
Enter *312*3# and mobile number.
Enter balance amount
Enter PIN. Default PIN is 1.
You’re done.
8.  Balance transfer for Uninor :-

Uninor customers just have to dial a simple code . The format is as follows –
*202*< Amount >#. Here, Mobile number is the receiver number and amount is the balance to be transferred. 
  • Limitations Processing fee is Rs.2 for every transaction . You can transferred amout of Rs.5 to Rs.50 . The transaction between the same number can occur only once in a day.
Hope that helps, do let us know if you are facing any difficulty in your comments.

Tuesday, November 26, 2013

Get The Awesome Sharing Widget For Blogger, Wordpress♂♀


In this Post we are going to explain to all Bloggers How to Add a Sharing and Following widget. Like Below Image:
↓↓↓↓↓↓↓↓↓↓↓↓↓↓↓↓↓↓↓↓↓↓↓↓↓↓↓↓↓↓↓↓↓↓↓↓↓↓↓↓↓↓↓↓↓↓↓↓↓


Do You Want the Sharing widget like The Upper Pic:

You Just Need To do the following Steps:

For Google Bloggers

  1. Go to The Given Link → 
  2. Select your platform as shown in the below image


3. Choose the Required things eg. Follow, Share etc
4. Then Click Install Blogger Widget.

That's all You are Done.

For Wordpress Users:

Just all Wordpress Users choose The platform as wordpress and click Install Plugin.
That's all.

Get a Sharing Buttons For Your Blogger or wordpress.


For Bloggers :

1. Go to The given Link. ←
2. Click at Get Sharing buttons For Blogger
3. Then Just Click on Install Blogger Widget.

"You are Done"

Steps For Wordpress Users:

First Select Your Platform as Wordpress.Then ↓

Instructions:

Step 1
Log-in to your WordPress blog.
Step 2
Click on Plugins in the sidebar.
Step 3
Click the Add New button.
Step 4
In the search box, typeAddThis, and click Search.
Step 5
In the results page, clickInstall Now.
Step 6
On the Install page, clickActivate Plugin.
Step 7
To start setting up your new AddThis widget, click onSettings in the left sidebar.
Step 8
Then click AddThis in the left sidebar.
Step 9
To configure the style, location, and set up analytics, follow the instructions on this page. When you've finished setting everything up, click Save Changes, and you're done!


If You Liked The Above Content, Dont Forget to Like usand Subscribe to our Email Alerts.

Monday, October 28, 2013

Get Thousands Of Likes For Free In a Minute


The Trick is About How to Get Likes On facebook For Free...Without Doing Anything

Hey Friends Today i am back with this new Amazing Trick Of Getting thousand's of Likes, Twitter Followers, PinInterest Likes etc

We Know that many of our Blog Readers have their Own Site/Blog too.But Having a site/blog is not much, we all also want to be as much famous as possible. We are also like other Bloggers who want to be famous.
So today we are going to teach a trick to all bloggers and and site owners How to be Popular socially. Without doing any thing....

How To Get Thousand's of Fans :

The Trick starts here...
First: You need to register to a Site :::::Register it Here

Second: You will Get 50points as your registration Bonus.

Third: You all have to Earn Points  in it...Don't Worry further we are providing the Trick how to earn points.

Fourth: You all Have to enter your FB, TT, Pinit, URl of Site/Blog etc...and decide how many points you want to give to users who visit/like your pages....


Like This Only The Site rotates the traffic from one Page To Another...You All Have to do nothing ...Just Sit and Enjoy...

Description Of the Site???? 

Addmefast is free social exchange network which helps you grow your social presence.
You can add your pages/accounts/music videos/websites clicking on the green button '' Add Site/Page''. You have to choose a network type, input title (if necessary), then add the URL or username/ID and set CPC * (Cost (points) Per Click for your Site/Page - min=2 and max=10) and then click the save changes button. After this, the link you have added will appear in ''My sites'' section. If you want to pause campaign for one of your site/page - click on the pause button(CPC=0 automatically). If you want to start it again, you can click on the start button (CPC=5 automatically) and then change your CPC. You can delete the link that you have added whenever you want taking into consideration that the link that you have removed can't be added any more by another user but you. You can add unlimited amount of links for any type of network.

Some Important Features of AddMeFast: 

  • Easy and Simple to Use.
  • Just Register and Enjoy.
  • Earning Points is Very easy, We are providing the Trick How to Earn Points.
  • Higher the CPC Rate...The more Visits/Like on your Page/Blog.

Click Here To Register.... 

Now Here Comes The Original Trick:Earning Points. 


  • Now You Just need to download The Scripts.Get It Here.
  •  after download scripts extract .rar file and copy all .iim files and past this location
  • copy/paste your macro in - "C:/User/YOURCOMPUTERNAME/Documents/imacros/macros"
  •  after pasting your files in this location open your firefox browser and click on imacros icon
  •  Select any option like fb_pagelikes fb_postlikes etc etc
and in max type any value you want like this 200 or 2000
and then click on play loop
make sure when you do this your facebook and addmefast account is login


You all Are Done Now Enjoy Thousands of Fans and Followers....In A Day....

Saturday, October 26, 2013

Easiest way Bypass The FileIce Survey


Hello Everyone,

Today i am going to give you the tutorial on Easiest way to Complete FileIce Survey. You don’t need to download any thing and install.

Things Required: 

  • A Proxy Tool, I prefer to use ULtraSurf. You can download it from Here.


  • A temporary E-mail address. For that you can use 10minutemail.com


    .

 Steps to Follow:

1) First connect to internet via your modem or mobile then go to Ultrasurf folder and run it.

Ultrasurf_connect2) Wait for some time. It will automatically connect and opens Internet Explorer.

3) Now you can either use internet explorer or Google chrome for downloading file.

4) Go to your Internet Download Manager, If installed, and remove the file extension ZIP, RAR, TXT or any you don’t want to download via IDM.

IDM Screenshot5) Now put your Link in Internet Explorer.

Internet Explorer 16) After selecting Regular Download, You will get below list in surveys,

Select Survey7) After that you have to fill a form where only a E-Mail ID is needed. For that Just go to 10minutemail.com and copy the temporary Email ID and fill the form like this,

Create Player8) After you submit the form, your file will be unlocked.

File UnlockedIf you have any problem Comment below.

Happy Hacking. 

Don’t Forget to like me on Facebook.

Saturday, October 19, 2013

How to download Android Apps and Games On PC from Google PlayStore-


A utility to download Android apps from Google Play Store directly to your PC.

We have been testing and reviewing a lot of Android phones and tablets in the recent past, and we definitely need to keep a few apps for benchmarking and other such information. In order to do the same, we initially need to set up wireless networking, punch in the credentials of the Google account, then search for the needed apps and download them. Downloading apps from the Google Play Store requires an account and hence the entire exercise. This is not only time consuming, but also painfully slow at times when the Internet connection is down or weak. In order to get things in the fast lane, we use an app to back up the apps and save them on the PC. On the other hand, as we all know, most apps keep being updated by their developers and tracking the updates is not possible if we do not have the Google account setup on the Android device. This means doing the same thing all over again and hitting the 'Update App' button every time we have to test a new device. 
Real APK Leecher
Real APK Leecher

 
Many others who constantly do ROM installations and updates on their Android devices would also like to keep a backup of the apps. Installing apps directly from the SD card not only saves downloading time, but also helps you save money by using the Internet on 3G connections. You can save apps to the SD card using third-party apps such as File ExpertTitanium BackupApp Monster and other such utilities, but they only save the currently installed apps. So then, what about new updates for the apps? Updating the app is only possible after installing it and then running the Play Store to check for any updates.  
Setup the utility
Set up the utility

 
In order to overcome this obstacle, we found a Windows-based utility on the XDA forums, developed by the ‘Codeimba.com’ team from Vietnam, called ‘Real APK Leecher’. The software is a JAVA-based utility, which connects to the Internet and the Google Play Store online. The utility needs to be filled with the details of your Google account and the Device ID of your phone in the options. Once the necessary details are filled, it can be used to search and download apps from the Play Store. You can also specify a folder where you have existing apps stored so that they can be scanned and checked for any updates. The apps and updates can be downloaded to a folder of your choice. Read ahead for a walk through on how to get the app and set it up on your PC.
Get your Device ID
Get your Device ID

 
Download the Real APK Leecher utility from here. Download the archived ZIP file and unzip the contacts to a folder on your desktop. Now open the folder and run the file ‘Real APK Leecher.exe’. Since you would be running the utility for the first time, the options (Configuration window) will be shown. In this window, you will need to give in the details of your valid Google email address, the password to the email account and the Device ID. The device ID will be available on your phone itself; you need to extract it using a simple code on the phone dialler. Start the dialler on your phone and punch in the below mentioned code:

                                         *#*#8255#*#*

The details of this procedure are also provided in the same window where these details need to be fed in the utility.  If you are using a tablet, the phone dialler will not be available. You can download an app called ‘DeviceID’ to get the details of your tablet. These settings need to be done only once, unless you change the phone, tablet or Google account. Further, you have the choice of showing the number of records between 10 to 30 apps on the page while searching for apps. Next, choose the language and country, leave the SIM Operator Number as empty (default) and enter the location to save the downloaded apps along with the location for the folder where your apps are already downloaded and need updates. After these settings are done, you can click on the Save button and the utility will start.   
Search for the app you want to download

Download the app
Set the download location

Set the download location
Download the app

 
Note: If you make any mistake in the settings, especially with the email address, password and device ID, the utility will not work as it will give you an error in logging into your account. Double-check your settings if you get any errors.

Now that the utility has started, you can search for the app using its vendor name, package name or custom name in the search bar. Depending on the choice you made earlier, the number of searched apps will be listed in the window below. To download the app, simply click on it once to highlight the entire field, then right-click on the line and select the download option.

Note: The searched apps will have both free and paid versions showing up and you can only download free versions. If the app is a paid version, you will not be able to download it, as there are no options for payment through this utility. You can hit the Google Play link to go to the Play Store and do the necessary payments there. If you have already paid for the app earlier, then you can download the app without this extra step. 
Check for app updates on your PC

 
To check for updates for your already downloaded apps, you can right-click on any app in the list and click on the ‘Scan Existing Folder’ option. The utility will then ask you one more time if you want to scan the folder you previously entered in the options or any other folder on your PC. Click on OK and the utility will scan every app in the specified folder and list the entire content of that folder. Each app will be listed with icons, which will specify if there is an update available for any of the apps. The icon with the exclamatory mark in a triangle is the one with updates available. Next, right-click on the app and click on the download option. Apps that are not available on the Play Store or are pirated will show up with a question mark, whereas the ones with the green check mark are apps that have no updates. 
Existing app updates are shown with exclamatory symbols
Existing app updates are shown with exclamatory mark symbols


You can also use this utility to download apps that are not available in your country by changing the SIM Operator Number in the options field. Apps that have carrier restrictions can be faked to get the apps downloaded. To do this on your phone itself, you need to have a rooted phone and market enabler app. Using this utility, you can do it without any hitch. The SIM Operator Number (SON) for various mobile carriers around the world can be availed from here. The SON is a combination of the MCC and MNC numbers. SON = MCC + MNC. For example, Vodafone IN Mumbai has MMC number 404 and MNC number 20, which makes the SON 40420. Enter this number in the SON field in the options window. 

Disclaimer: Try this utility at your own risk. This utility and tutorial is for educational purposes only. We do not take any responsibility for misuse of this app. Please read the T&C for Google Play before downloading the apps.